
The Complete Guide to Running ComfyUI Workflows in the Cloud with RunPod

The only guide you need to run all workflows in the cloud for lightning-fast generations for images and videos!
People think cloud hosting is expensive, but this has changed with RunPod. You can generate up to 1,000 images and 100 videos with a budget of just $10, and the best thing is - sign up with our link and you get $5 on top.
Compared to external generation sites, RunPod is much cheaper and faster, making it worth the time to set up your workflow and get comfortable with the platform.
Special Offer - $5 Credit Included!
When you sign up for RunPod using our affiliate link, you'll receive a $5 credit that can be used to generate up to 1,000 images and 100 videos. This gives you plenty of resources to explore ComfyUI and AI image/video generation without any upfront cost!
What You'll Learn
Prerequisites
Before starting, ensure you have:
- A valid payment method (credit card)
- Minimum $10 for initial funding (or use our $5 credit!)
- Your ComfyUI workflow files ready
- Basic understanding of ComfyUI (check our ComfyUI Installation Guide if needed)
Step 1: Sign Up for RunPod
Get started with RunPod and claim your free credit:
- Visit RunPod: Click on our affiliate link to sign up
- Create account: Complete the registration process
- Claim bonus: Receive your $5 credit automatically
- Add funds: Add at least $10 to your account for optimal usage
Pro Tip
Using our affiliate link gives you $5 in free credits - that's enough for 1,000 images or 100 videos!
Step 2: Choose Pod Templates
Navigate to the template selection:
- Click "Pod Templates": Find this option in the RunPod dashboard
- Browse templates: Explore the available pre-configured templates
Template Benefits
Templates come pre-installed with ComfyUI and all necessary dependencies, saving you setup time!
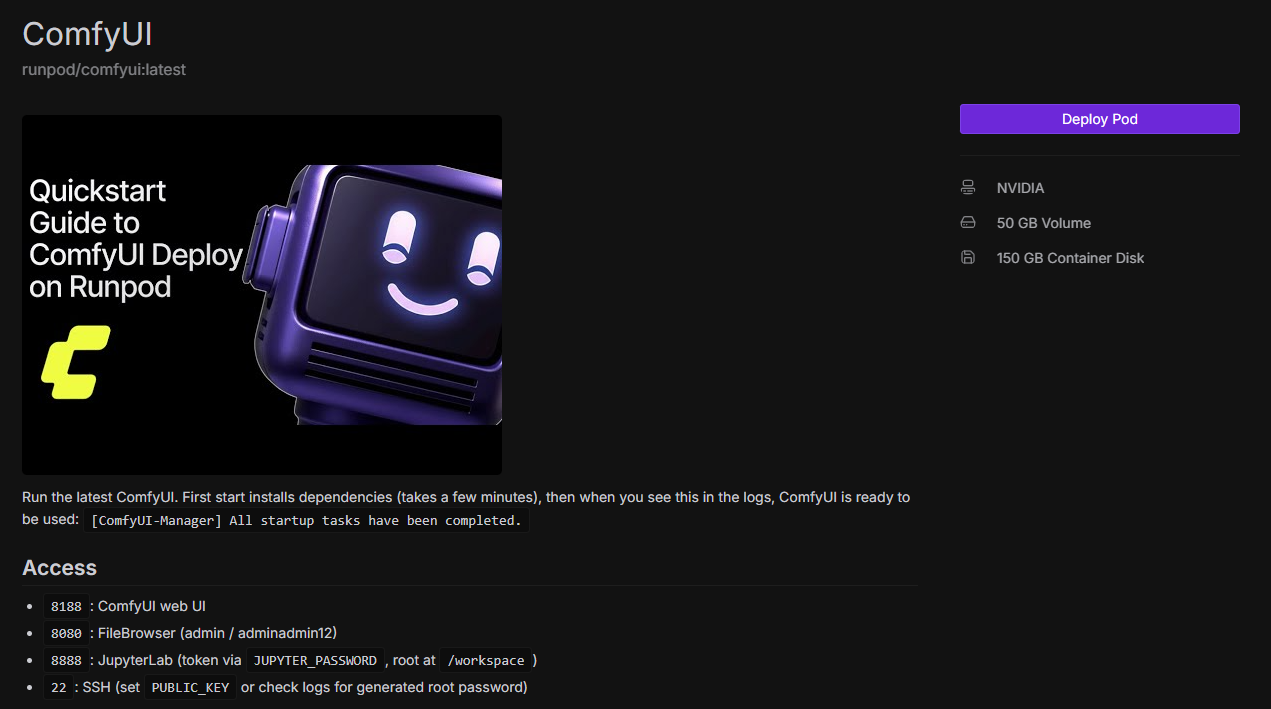
Step 3: Select ComfyUI Version
Pick the template that fits your needs:
- Find ComfyUI: Look for the ComfyUI:latest template
- Check version: This template has the most up-to-date ComfyUI version
- Read description: Review what's included in the template

Pro Tip
We recommend the ComfyUI:latest version to ensure you have access to all the newest features and bug fixes.
Step 4: Deploy Your Pod
Initiate the pod deployment:
- Click "Deploy Pod": Press the deploy button on your chosen template
- Read the credentials: A text box will appear with your login credentials
- Save credentials: IMPORTANT - Copy and save these credentials securely (username and password)
- Remember for later: You'll need these credentials to access the file browser
Save Your Credentials!
The credentials shown here are needed for the file browser login. Make sure to copy them before proceeding - they're often not shown again!
Step 5: Choose Your GPU
Pick the right GPU for your workflow:
- Review GPU list: Browse available GPUs and their specifications
- Check VRAM: Look at the VRAM (memory) each GPU offers
- Consider your needs:
- Image generation: Most GPUs are sufficient (8-16GB VRAM)
- Video generation: We recommend 32GB VRAM+ for best results
- Check availability: Select a GPU that's currently available

GPU Recommendations
- Simple Image Workflows: RTX 3080/3090 (10-24GB VRAM)
- Complex Image Workflows: RTX 4090/L40 (24-48GB VRAM)
- Video Generation: A100/H100 (40-80GB VRAM)
Pro Tip
Higher VRAM GPUs cost more per hour but can handle larger batches and more complex workflows. Match your GPU to your specific needs to optimize costs!
Step 6: Check Billing and Deploy
Finalize your pod configuration:
- Scroll down: Navigate to the billing section
- Review costs: Check the hourly rate and estimated costs
- Verify settings: Double-check your GPU selection and storage
- Click "Deploy On Demand": Press the button to start your pod

On-Demand vs Spot
On-Demand instances are more reliable and won't be interrupted. Spot instances are cheaper but can be terminated if someone else needs the GPU. For important work, stick with On-Demand!
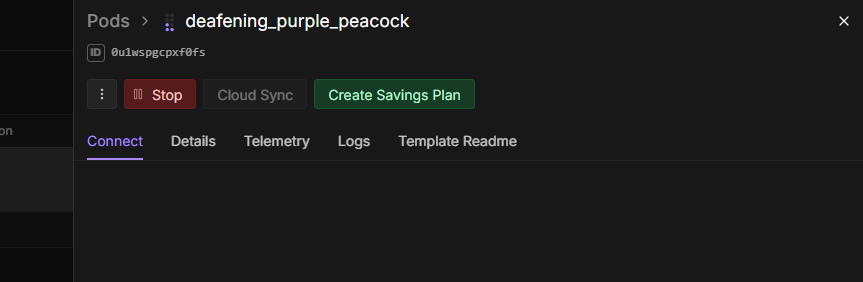
Step 7: Wait for Pod Initialization
Your pod is now starting up:
- Sidebar opens: A sidebar will automatically appear on the right
- Wait patiently: The pod initialization takes a few minutes
- Monitor progress: Watch the status indicators
Pro Tip
This is a good time to get a cup of coffee! Pod initialization typically takes 3-5 minutes depending on the template.
Step 8: Verify Service Status
Ensure all services are ready:
- Open sidebar: View the pod overview in the right sidebar
- Find "HTTP Services": Locate this section in the overview
- Check status: All services should show "Ready" status
- Wait if needed: If services show "Starting", wait a bit longer
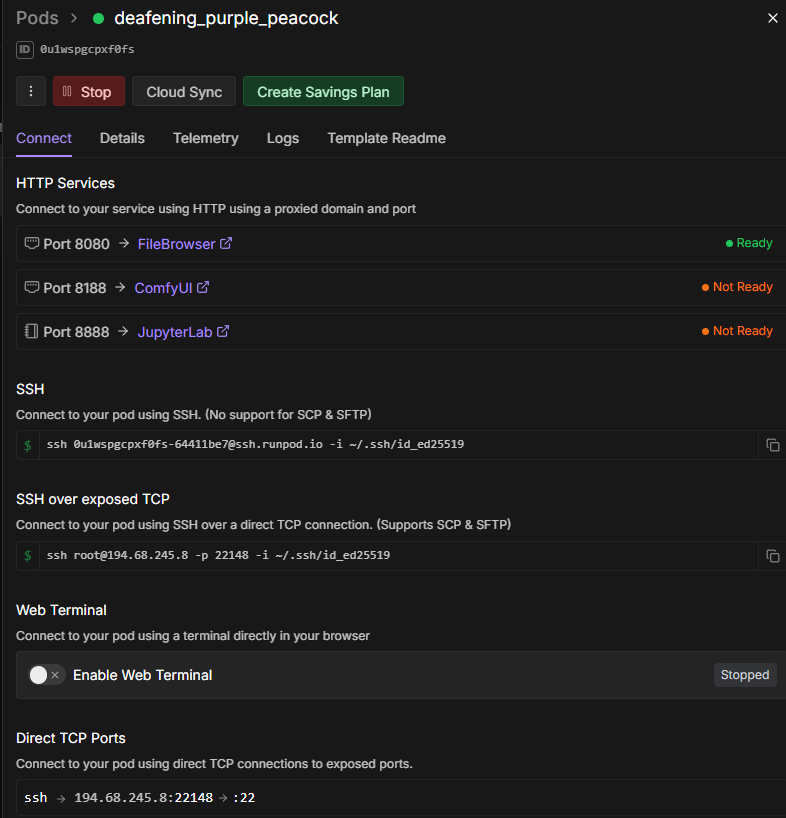
Service Status
Don't proceed until all HTTP services show "Ready". This ensures ComfyUI is fully loaded and ready to use!
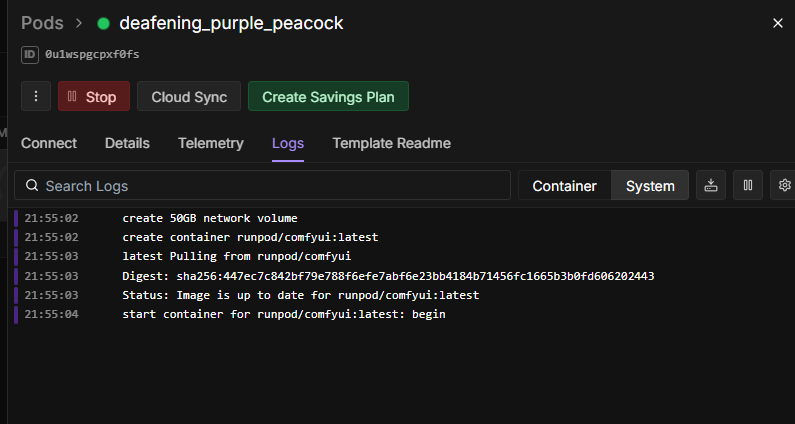
Step 9: Monitor Pod Logs
Check the detailed startup process:
- Click "Logs" tab: Find this tab in the sidebar
- View log output: Monitor the startup messages
- Look for errors: Check if there are any issues
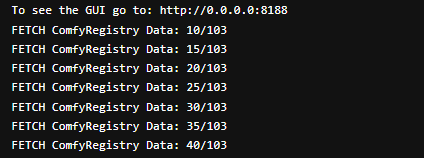
Step 10: Wait for ComfyUI Port
Verify ComfyUI has fully started:
- Watch the logs: Monitor the log output in the Logs tab
- Wait for port 8188: Look for the message showing "ComfyUI started on port 8188" or similar
- Be patient: This can take some time due to RunPod's high GPU power but lower CPU/network performance
- Confirm ready: Once you see the port message, ComfyUI is ready!
Startup Time
RunPod has excellent GPU power but limited CPU and network performance. Initial startup can take 5-10 minutes. Get comfortable and wait until the ComfyUI port shows in the logs!
Step 11: Verify All Services Ready
Confirm everything is operational:
- Return to overview: Click back to the main pod overview
- Check all services: Verify all HTTP services show "Ready"
- Confirm port 8188: Make sure ComfyUI port is active

Pod is Ready!
When all services show "Ready" and port 8188 is active, your pod is fully operational and ready to use!
Step 12: Access File Browser
Access the file management system:
- Find port 8080: Locate the File Browser service in the HTTP Services section
- Click port 8080: Click on the port number to open the file browser
- Login screen appears: You'll see a login window
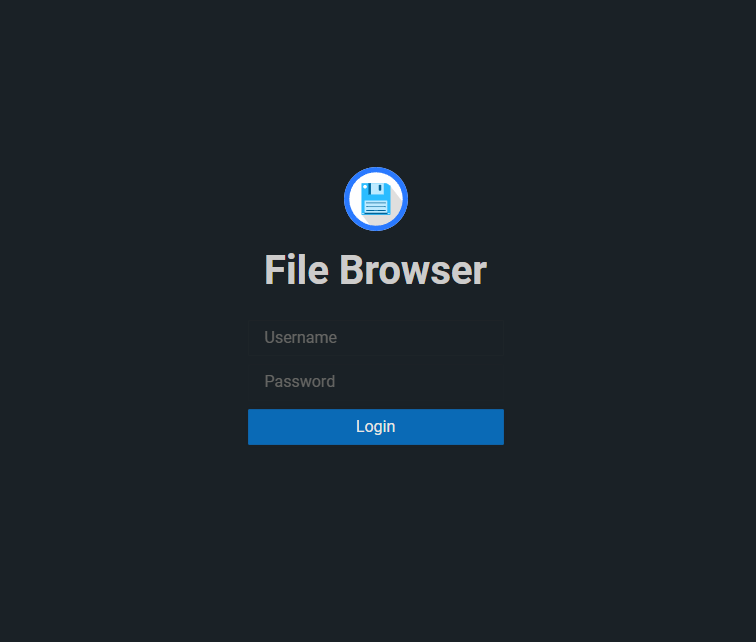
- Enter credentials: Use the credentials from Step 4 (usually username is "admin")
- Access granted: You now have full access to the file system
Pro Tip
The file browser works just like your local file explorer. You can upload, download, create, and delete files here!
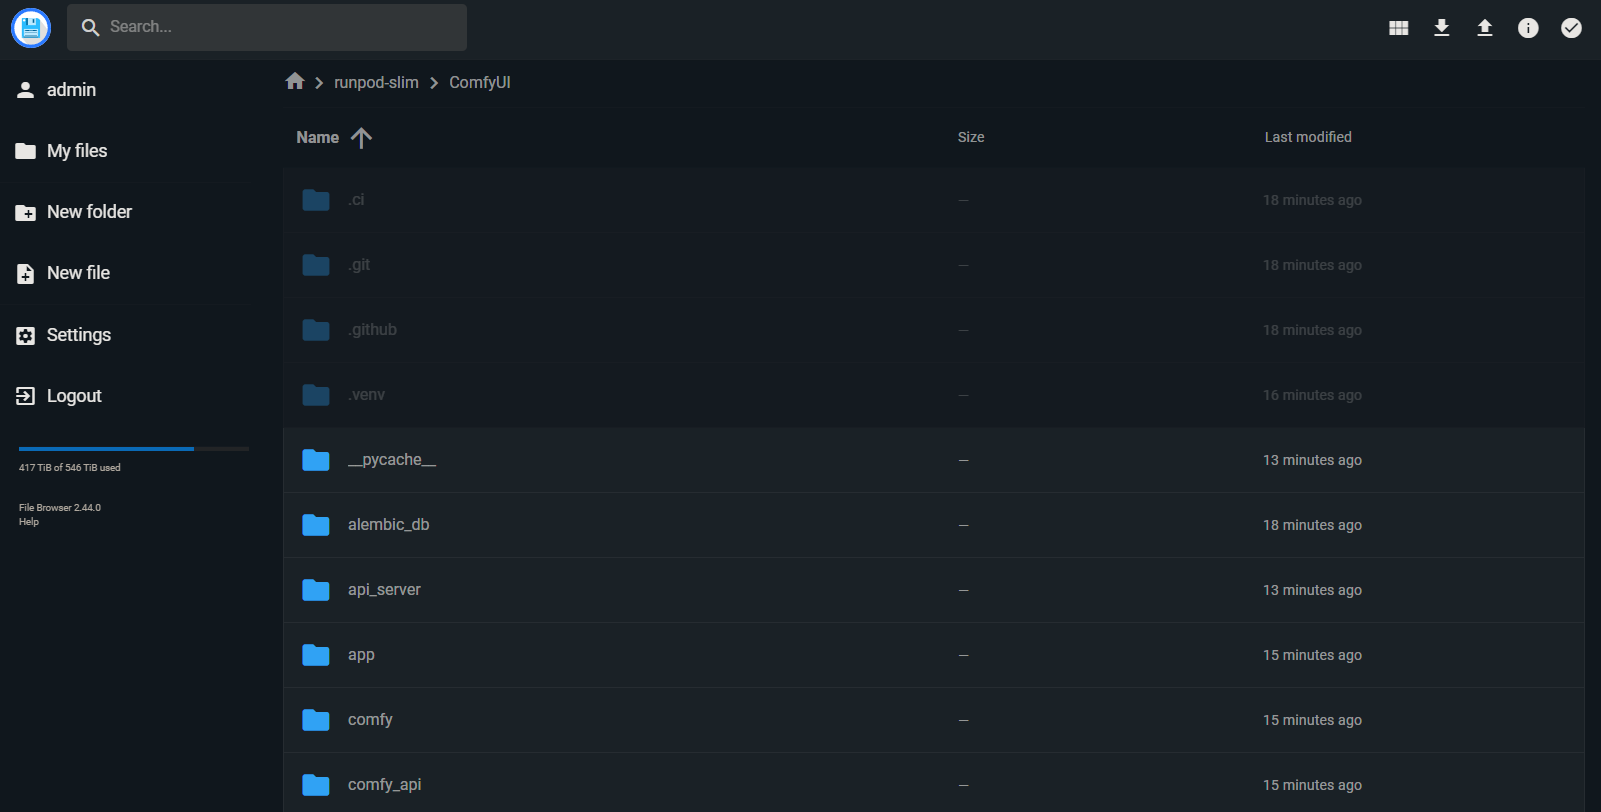
Understanding the File Structure
Key Folders
After logging into the file browser, here's where to put everything:
- models/: All your model files (checkpoints, LORA, VAE, etc.)
- custom_nodes/: Installed custom nodes and extensions
- input/: Images or files you want to use as input
- output/: Generated images and videos will be saved here
- workflows/: Optional folder for storing workflow JSON files
For a detailed explanation, check our ComfyUI Installation Guide and ComfyUI glossary.
File Organization
ComfyUI will automatically detect models and files placed in the correct folders. Just upload to the right location and refresh ComfyUI!
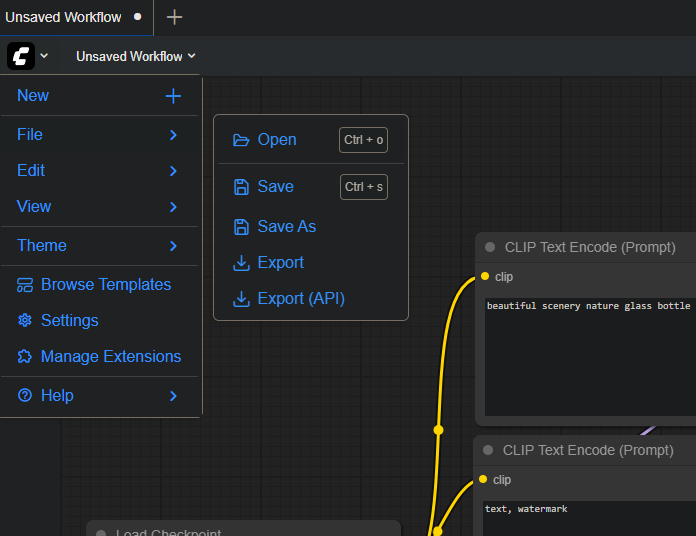
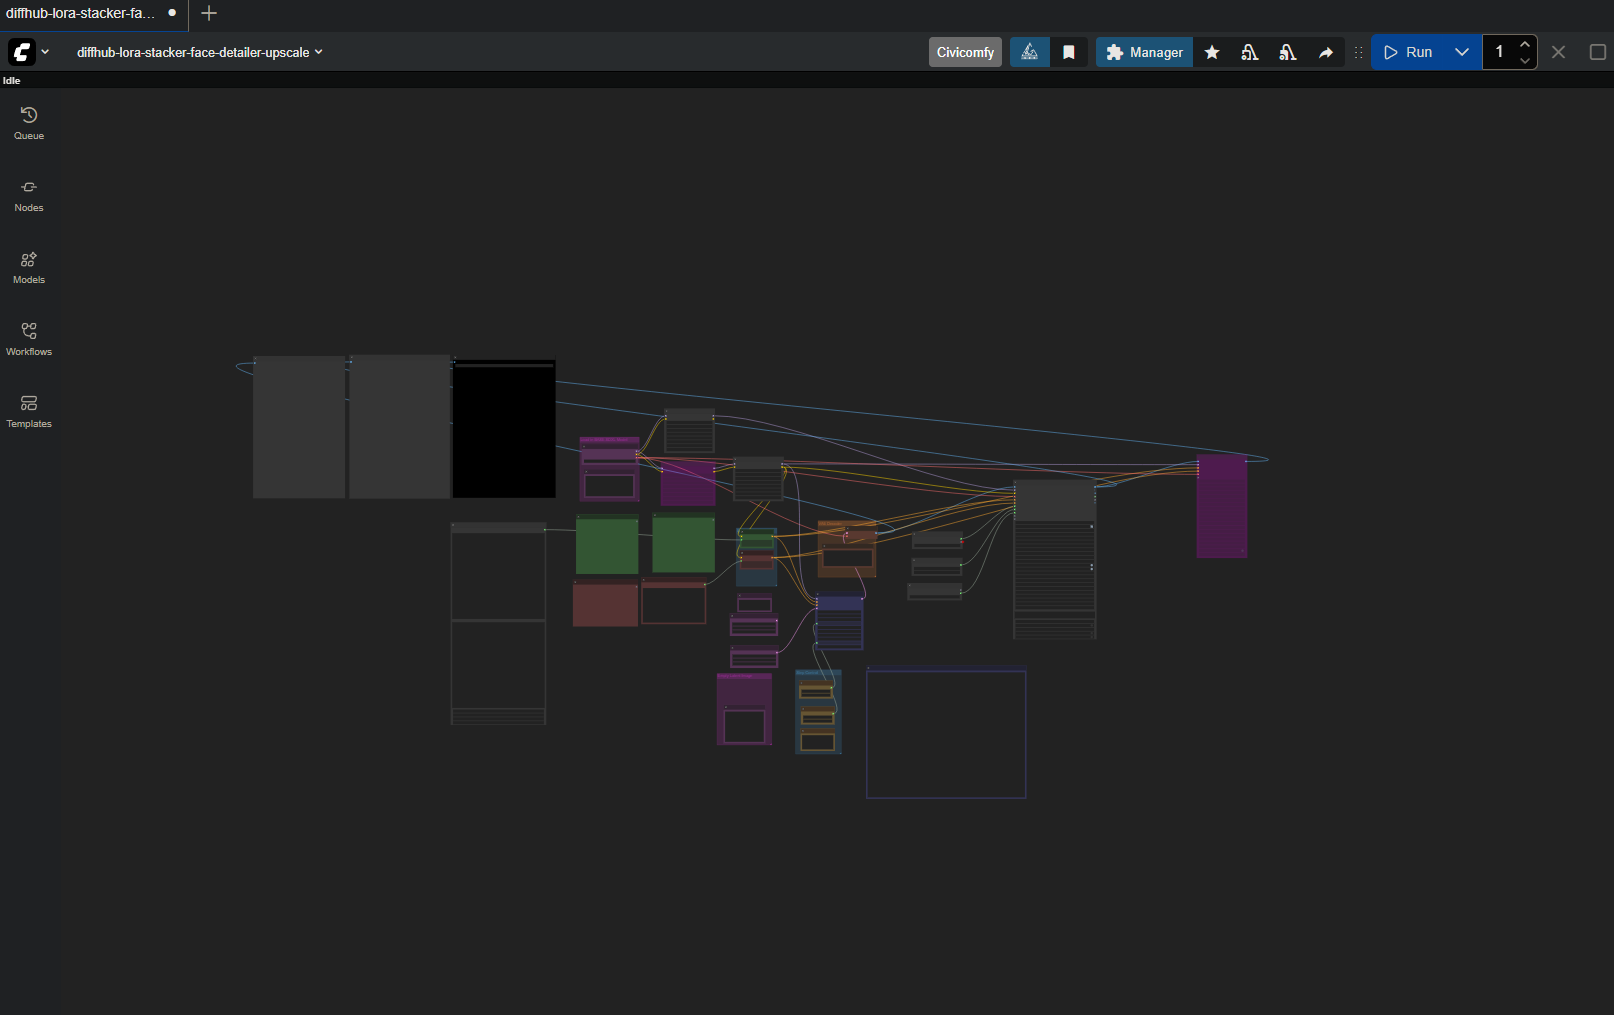
Step 13: Open ComfyUI Interface
Start using ComfyUI:
-
Return to overview: Go back to the main pod overview
-
Click ComfyUI port: Click on port 8188 to open the web GUI
-
ComfyUI loads: The familiar ComfyUI interface appears
-
Import workflow:
- Click the ComfyUI logo in the top left
- Select "File" → "Open"
- Browse and select your workflow JSON file
Pro Tip
You can also drag and drop your workflow JSON file directly onto the ComfyUI interface!
Step 14: Handle Missing Custom Nodes
Your workflow may require custom nodes:
- Message appears: A popup shows missing custom nodes
- Review list: Check which nodes are needed
- Don't worry: We'll install them in the next steps
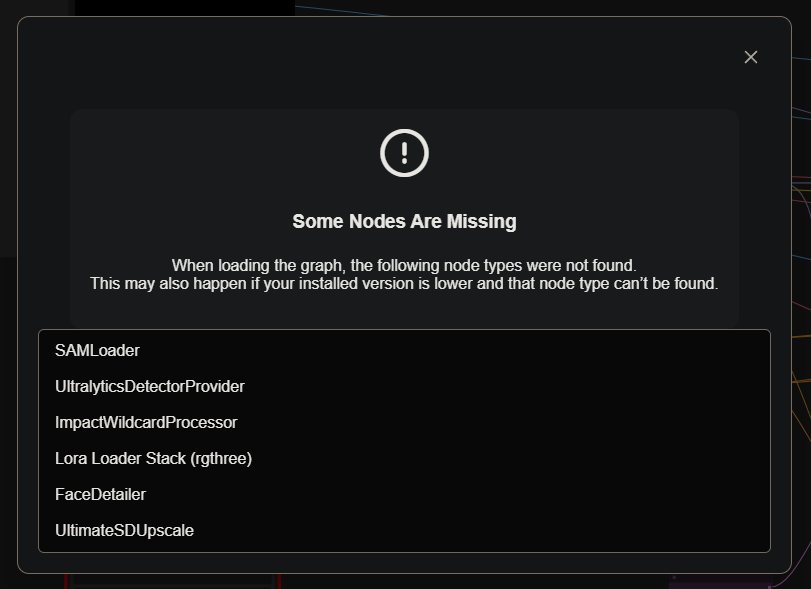
Why This Happens
Different workflows use different custom nodes. RunPod templates include common nodes, but your specific workflow may need additional ones.
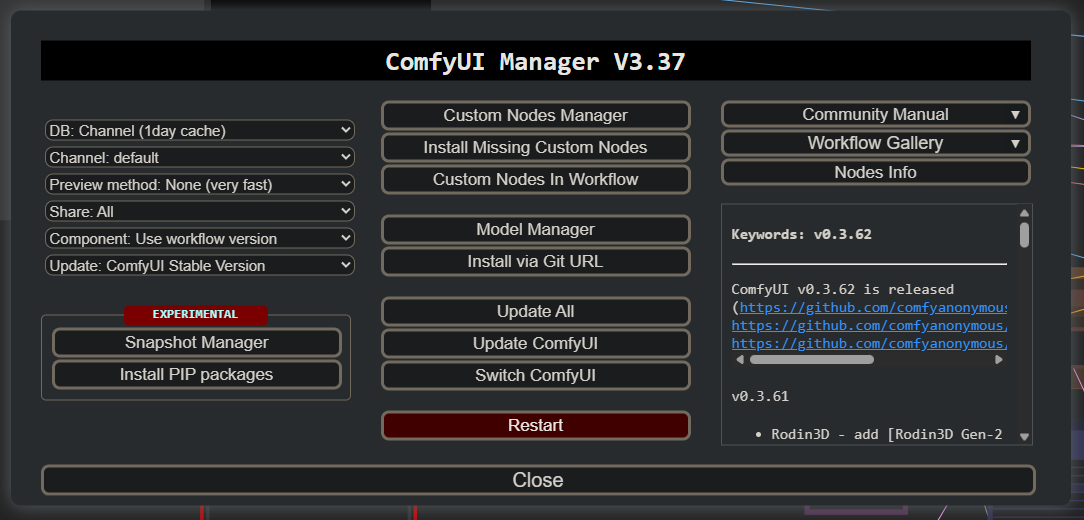
Step 15: Open ComfyUI Manager
Use ComfyUI Manager to install missing nodes:
- Find Manager button: Look in the top right corner of the ComfyUI interface
- Click "Manager": This opens the ComfyUI Manager panel

Step 16: Install Missing Custom Nodes
Install all required custom nodes:
- Click "Install Missing Custom Nodes": Find this option in the Manager menu
- Wait for list: A list of missing nodes appears
Step 17: Select All Missing Nodes
Select all nodes for installation:
- Review the list: Check all the missing custom nodes
- Select all: Click the checkboxes to select all nodes in the list
- Confirm selection: Make sure all required nodes are checked
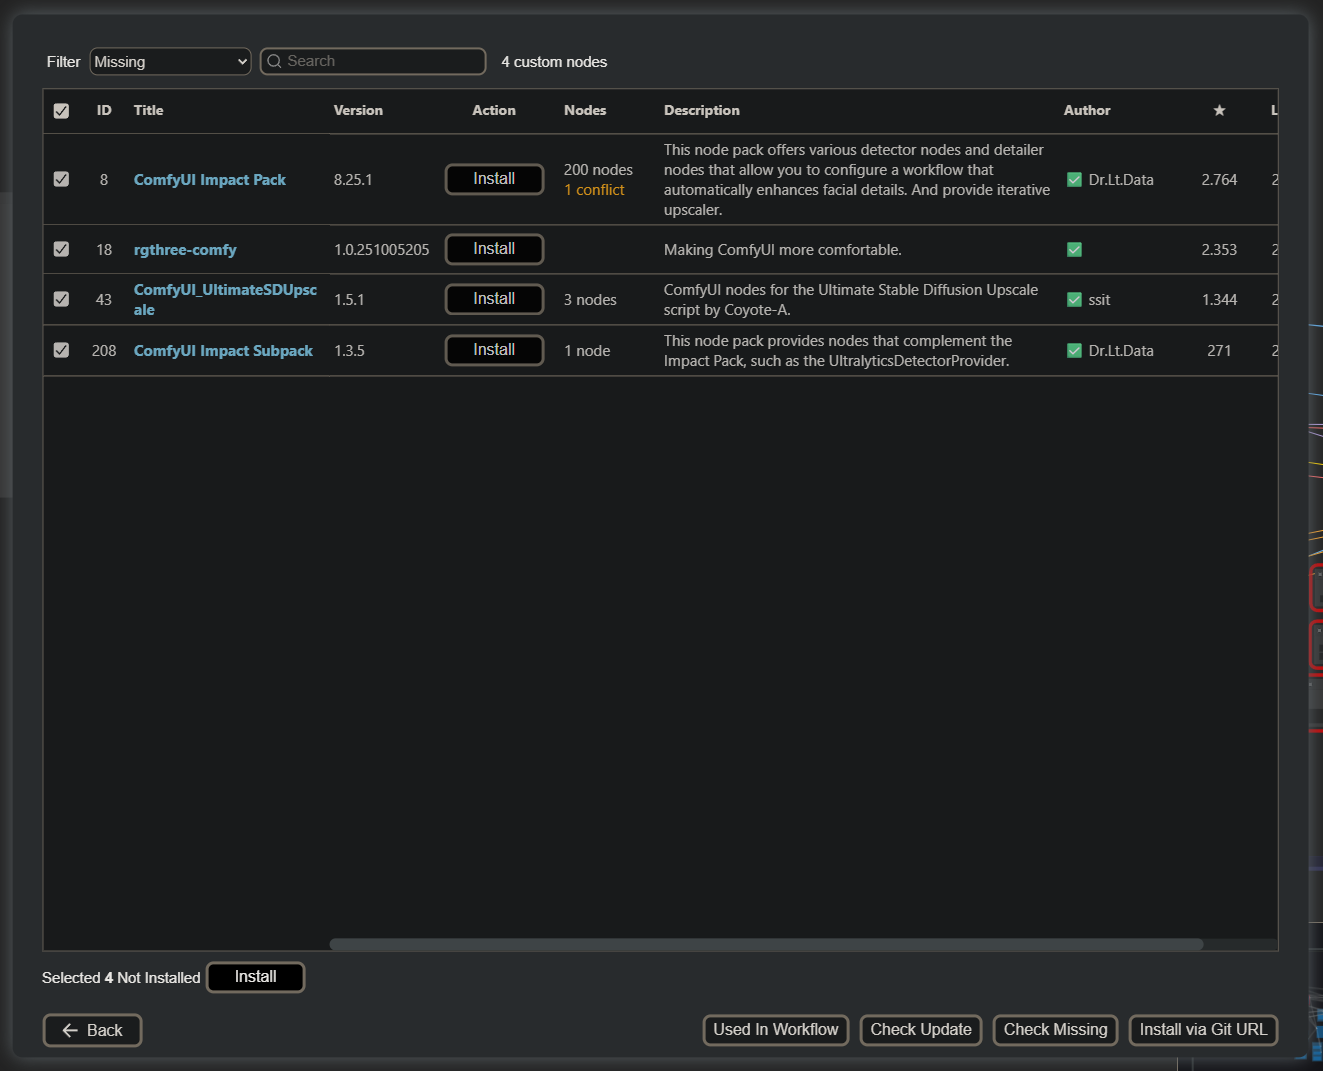
Pro Tip
Installing all missing nodes at once is faster than installing them one by one!
Step 18: Wait for Installation
Let the installation complete:
- Installation begins: Manager downloads and installs each node
- Watch progress: Monitor the installation status for each node
- Be patient: This can take several minutes depending on the number of nodes
- Wait for completion: All nodes should show "Installed" or "Complete"
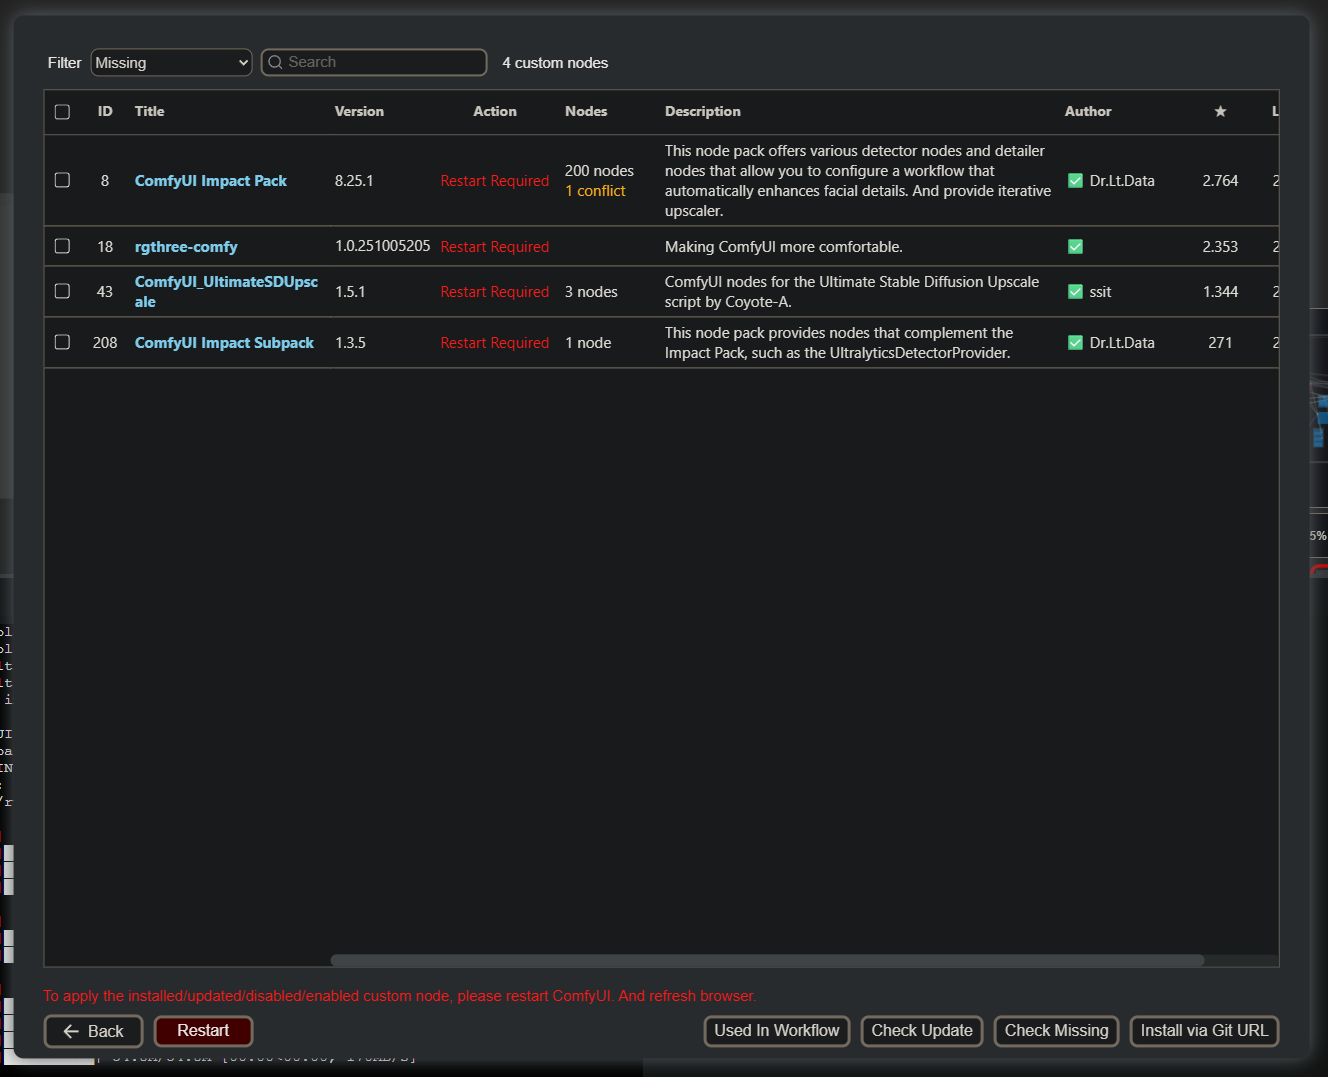
- Restart required: Click the "Restart" button in the bottom left when everything is done
Installation Time
Custom node installation typically takes 5-15 minutes depending on the number and complexity of nodes. Don't close the browser during this process!
Step 19: Wait for ComfyUI Restart
ComfyUI needs to restart to load the new nodes:
- Restart initiated: ComfyUI begins restarting
- Loading screen: You may see a "ComfyUI is starting" message
- Wait patiently: Give it 30-60 seconds
- Refresh if needed: If you see the loading screen for too long, refresh the page
Pro Tip
If the restart takes longer than 2 minutes, try refreshing your browser page. The interface should load immediately.
Step 20: Your Workflow is Ready!
Congratulations! Your setup is complete:
- Workflow loaded: Your ComfyUI workflow is now fully functional
- All nodes available: Custom nodes are installed and ready
- Start creating: Begin your generations!
Setup Complete!
You now have a fully operational ComfyUI instance running in the cloud with all your required custom nodes installed!
Remember
- Upload models: Add any required models to the correct folders in the file browser (port 8080)
- Check outputs: View your generated content in the GUI or in the comfyui/output folder
- File browser access: Use port 8080 to manage all files and outputs
Step 21: Important - Manage Your Pod
Optimize your RunPod usage:
- Pause when done: Always pause your pod after finishing your work
- Stop billing: Paused pods don't incur GPU costs (only minimal storage costs)
- Plan generations: Batch your work to minimize idle time
- Monitor usage: Keep an eye on your credit balance
Critical - Prevent Unnecessary Charges!
ALWAYS pause or terminate your pod when you're not actively using it! Running pods are charged by the hour. Set a reminder to check your pods regularly.
Cost Optimization Tips
- Batch your work: Queue multiple generations at once
- Use wildcards: Generate variations efficiently (check our guide on ComfyUI wildcards)
- Pause between sessions: Stop the pod if you're taking a break longer than 15 minutes
- Monitor costs: Check the billing tab regularly to track spending
- Choose appropriate GPU: Don't overpay for more VRAM than you need
Advanced Tips & Best Practices
Efficient Model Management
- Upload once: Use the file browser to upload models, which persist across pod stops
- Organize folders: Keep models organized by type (checkpoints, LoRAs, VAEs)
- Download from Hugging Face: Use the file browser terminal to download directly to the pod
- Delete unused models: Remove models you're not using to save storage costs
Workflow Optimization
- Test locally first: Perfect your workflow locally before running on RunPod
- Use batching: Generate multiple images in one session to maximize efficiency
- Save workflows: Keep backup copies of your workflow JSON files
- Document settings: Note which models and settings work best for your use cases
Troubleshooting Common Issues
If ComfyUI Won't Load
- Check the Logs tab for error messages
- Verify all HTTP services show "Ready"
- Try refreshing your browser
- Restart the pod if necessary
If Nodes Are Missing After Install
- Ensure you clicked "Restart" after installation
- Wait for the full restart cycle to complete
- Refresh your browser page
- Check Manager again to verify installation status
If Generation is Slow
- Verify you're using the correct GPU for your workflow
- Check if models are properly downloaded
- Monitor the Telemetry tab for GPU utilization
- Consider upgrading to a more powerful GPU
Related Resources
For more information on ComfyUI and cloud workflows:
- ComfyUI Installation Guide - Learn ComfyUI basics and file structure
- Deploy Your First RunPod - Basic RunPod account and pod setup
- Running ComfyUI on RunPod - Alternative RunPod setup guide with different focus
Next Steps
Now that you have ComfyUI running on RunPod:
- Experiment with workflows: Try different workflows from the community
- Explore custom nodes: Discover new custom nodes in ComfyUI Manager
- Learn wildcards: Check our guide on using wildcards for batch generation
- Join the community: Connect with other users in Discord for tips and workflow sharing
- Build your library: Create a collection of your favorite workflows and models
- Share your work: Show off your generations in the community
Need Help?
Get support and connect with the community:
- Discord: Join the DiffHub community for workflow help and tips
- RunPod Support: Visit RunPod's Discord for platform-specific issues
- ComfyUI Docs: Check the official ComfyUI documentation for node information
- Community Workflows: Explore shared workflows for inspiration and learning
Start Creating Today!
With this guide, you have everything you need to run powerful ComfyUI workflows in the cloud. Remember to use our affiliate link to get your $5 bonus credit and start generating amazing content!
Happy Generating! 🎨✨