
Master the installation process for ComfyUI, the revolutionary node-based AI image generation platform that's transforming creative workflows worldwide.
What You'll Learn
Understanding ComfyUI
ComfyUI represents the cutting edge of AI-powered creative tools, offering unprecedented control over image and video generation through its innovative node-based architecture. This powerful open-source platform enables creators to harness advanced local AI models for everything from photorealistic image generation to complex compositing workflows.
The platform's modular node system provides granular control over every aspect of the generation process, allowing users to combine and customize AI models with surgical precision. Whether you're crafting cinematic masterpieces or exploring experimental visual styles, ComfyUI's thriving open-source ecosystem makes it the ultimate creative laboratory for artists, developers, and AI innovators.
System Requirements
Before proceeding, ensure your system meets these requirements:
- Windows 10/11 (this guide focuses on Windows installation)
- NVIDIA GPU with CUDA support (recommended)
- At least 8GB RAM (16GB+ preferred)
- 20GB+ free disk space for models and workflows
Step-by-Step Installation Process
Step 1: Acquiring ComfyUI
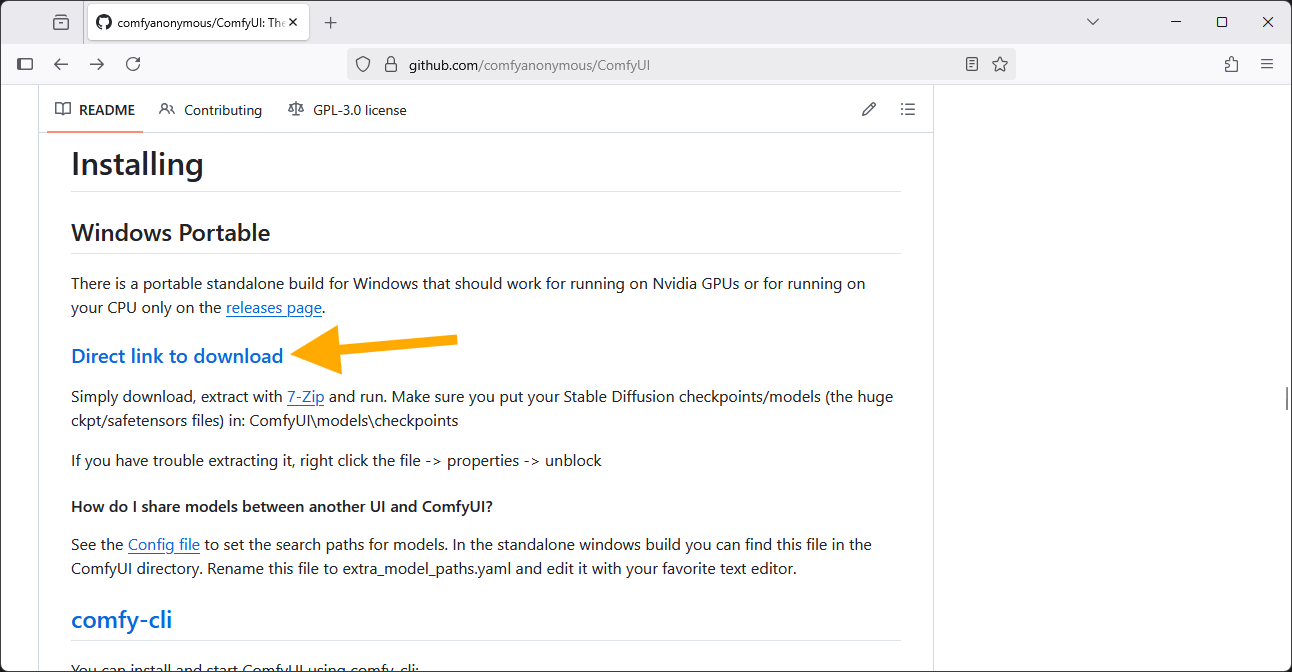
Begin your ComfyUI journey by obtaining the software from the official source:
- Navigate to the Official Repository: Visit the ComfyUI GitHub page to access the latest version
- Select the Portable Version: For maximum compatibility and ease of use, choose the portable version over the desktop app
- Download the Archive: Click "Direct link to download" to get
ComfyUI_windows_portable_nvidia.7z - Extract to Your System: Unzip the downloaded archive to any convenient location on your computer
Pro Tip
The portable version is recommended because it's self-contained, doesn't require system-wide installation, and has been extensively tested by the community.
Step 2: Installing Git
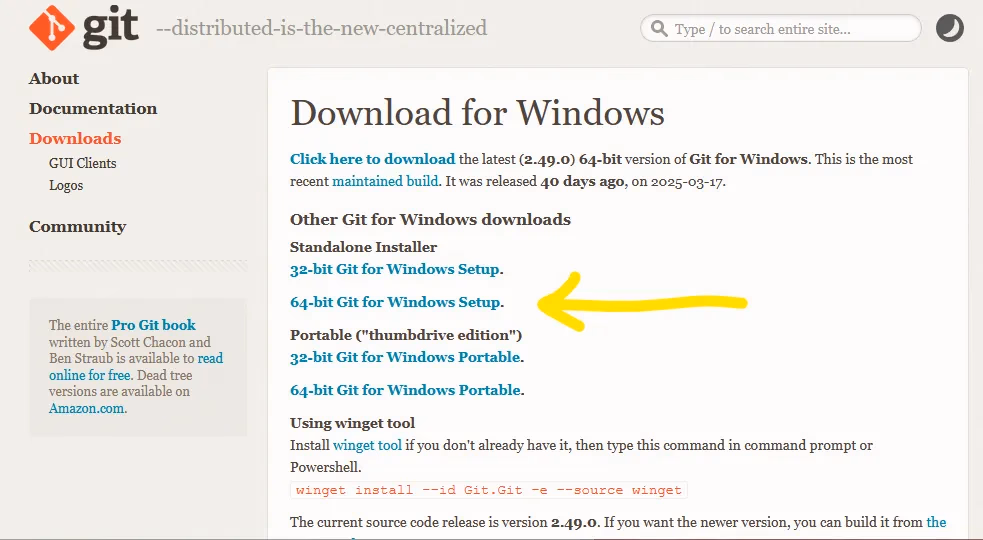
Git is essential for managing ComfyUI's dependencies and custom nodes:
- Access Git Downloads: Visit the official Git download page
- Choose Standalone Installer: Download the Windows Standalone Installer
- Run Installation: Execute the installer with all default settings - no modifications needed
Why Git is Required
Git enables ComfyUI to automatically download and manage custom nodes, models, and updates from various repositories across the internet.
Step 3: Configuring ComfyUI Manager
The ComfyUI Manager is your gateway to the vast ecosystem of custom nodes and extensions. This essential tool allows you to easily install, update, and manage custom nodes that extend ComfyUI's capabilities.
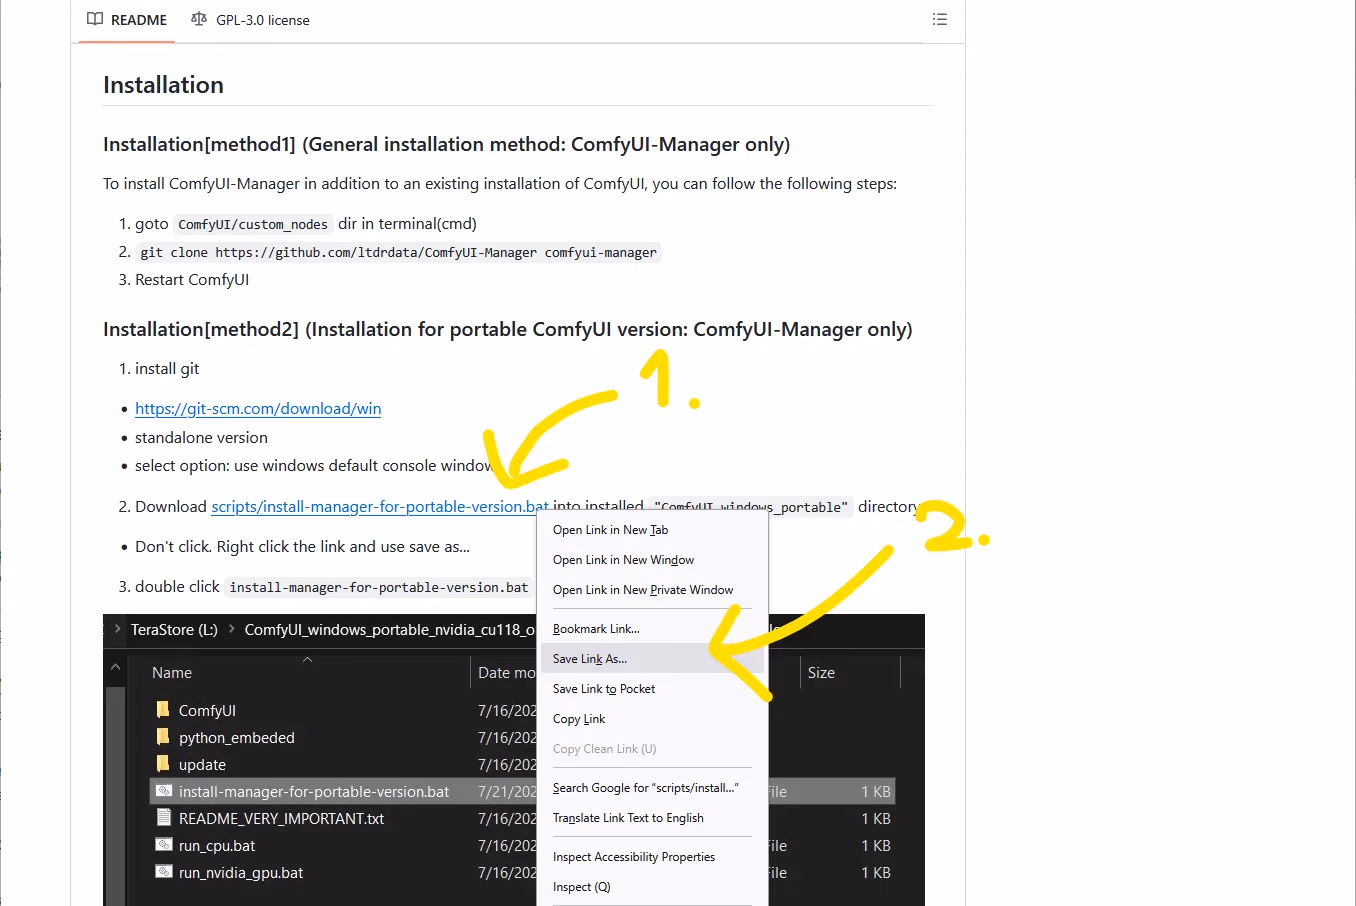
Begin by obtaining the ComfyUI Manager installation script:
- Visit the Manager Repository: Navigate to the ComfyUI Manager GitHub page
- Locate Installation Section: Scroll down to find the "Installation" area
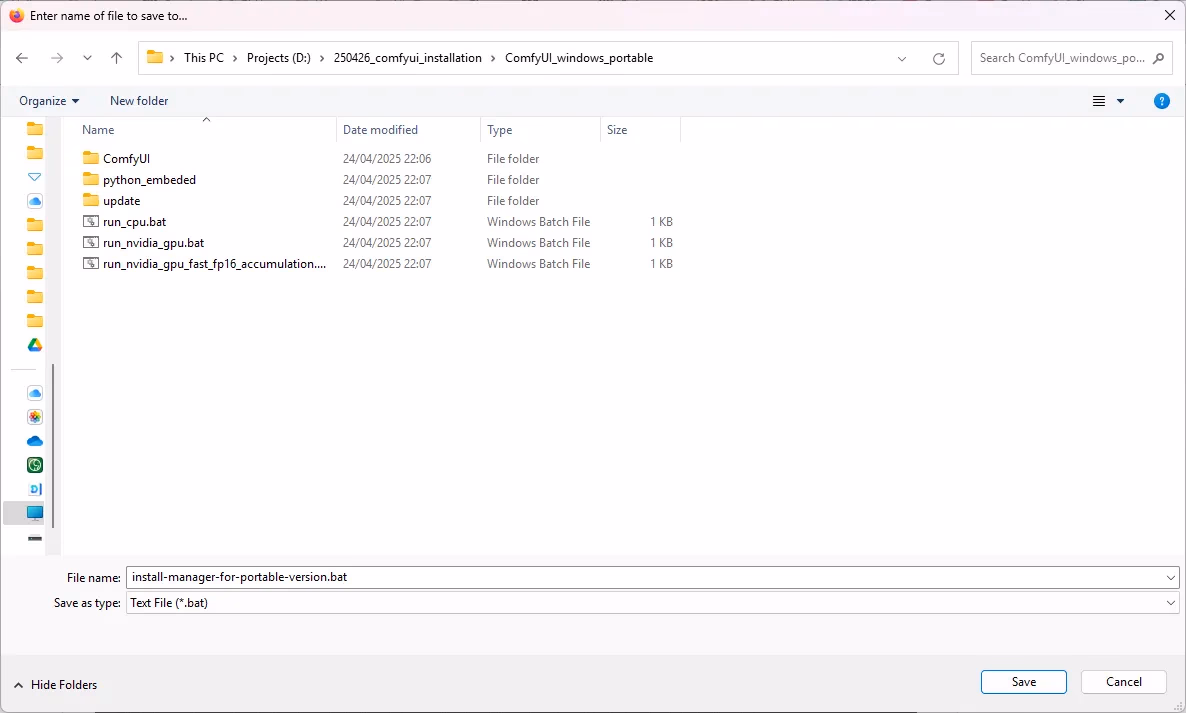
- Download the Script: Right-click on
scripts/install-manager-for-portable-version.batand select "Save Link As..." - Place in ComfyUI Directory: Save the file directly in your
ComfyUI_windows_portableroot folder
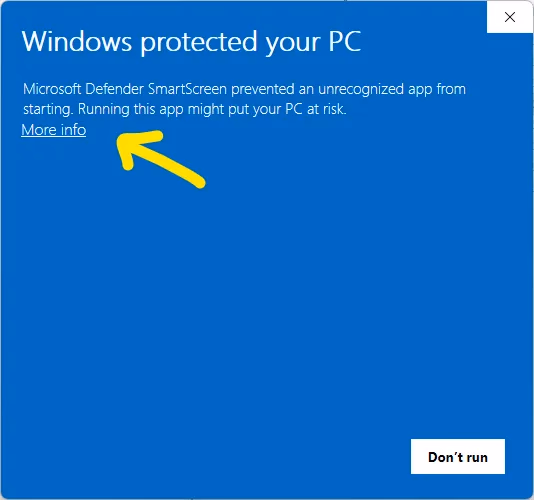
Security Notice
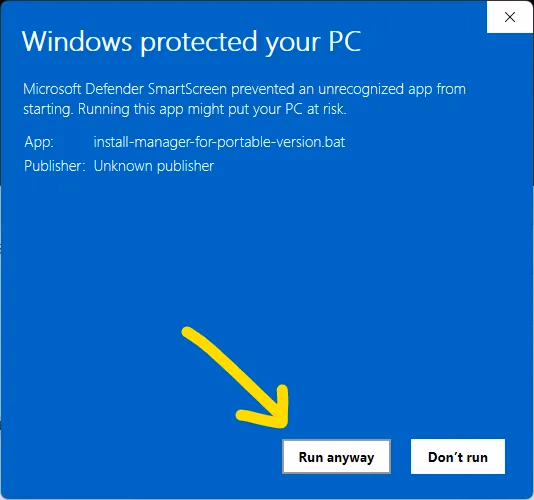
Windows Defender may flag the installation script. This is normal for batch files. Click "More info" then "Run anyway" to proceed safely.
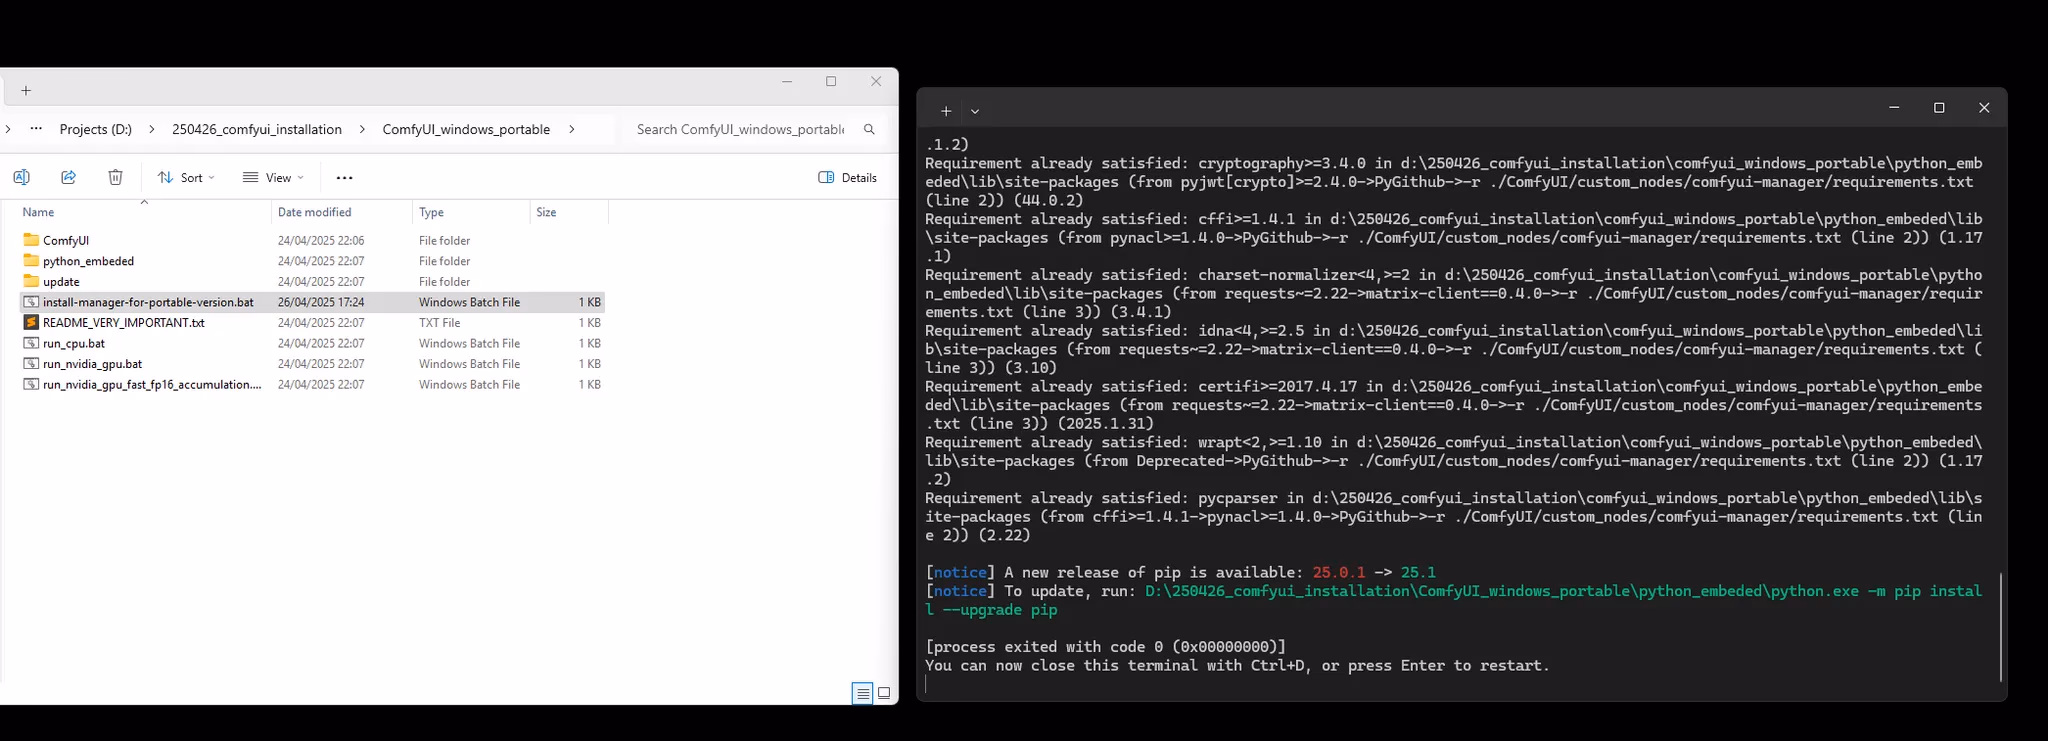
Now let's run the installation script and monitor the complete setup process:
- Run the Installation Script: Double-click the saved
.batfile to begin installation - Handle Security Prompts: If Microsoft Defender appears, click "More info" followed by "Run anyway"
- Monitor Progress: Watch the command window as it downloads and configures the manager
- Wait for Completion: Allow the process to finish completely before proceeding
Installation Complete!
The ComfyUI Manager is now integrated into your installation and ready to manage custom nodes automatically. You'll see the Manager button in your ComfyUI interface once you launch the application.
Step 4: Launching ComfyUI
Begin your ComfyUI experience:
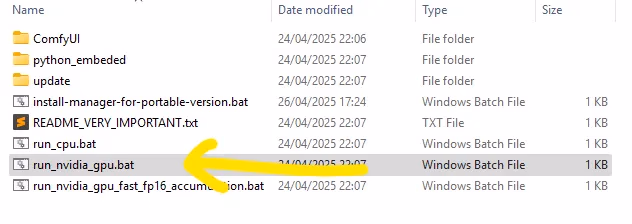
- Navigate to Main Directory: Open your ComfyUI installation folder
- Execute the Launcher: Double-click
run_nvidia_gputo start ComfyUI - Wait for Initialization: Allow the system to load all components
- Access the Interface: ComfyUI will automatically open in your default web browser
Pro Tip
The first launch may take longer as ComfyUI initializes all its components and checks for available models.
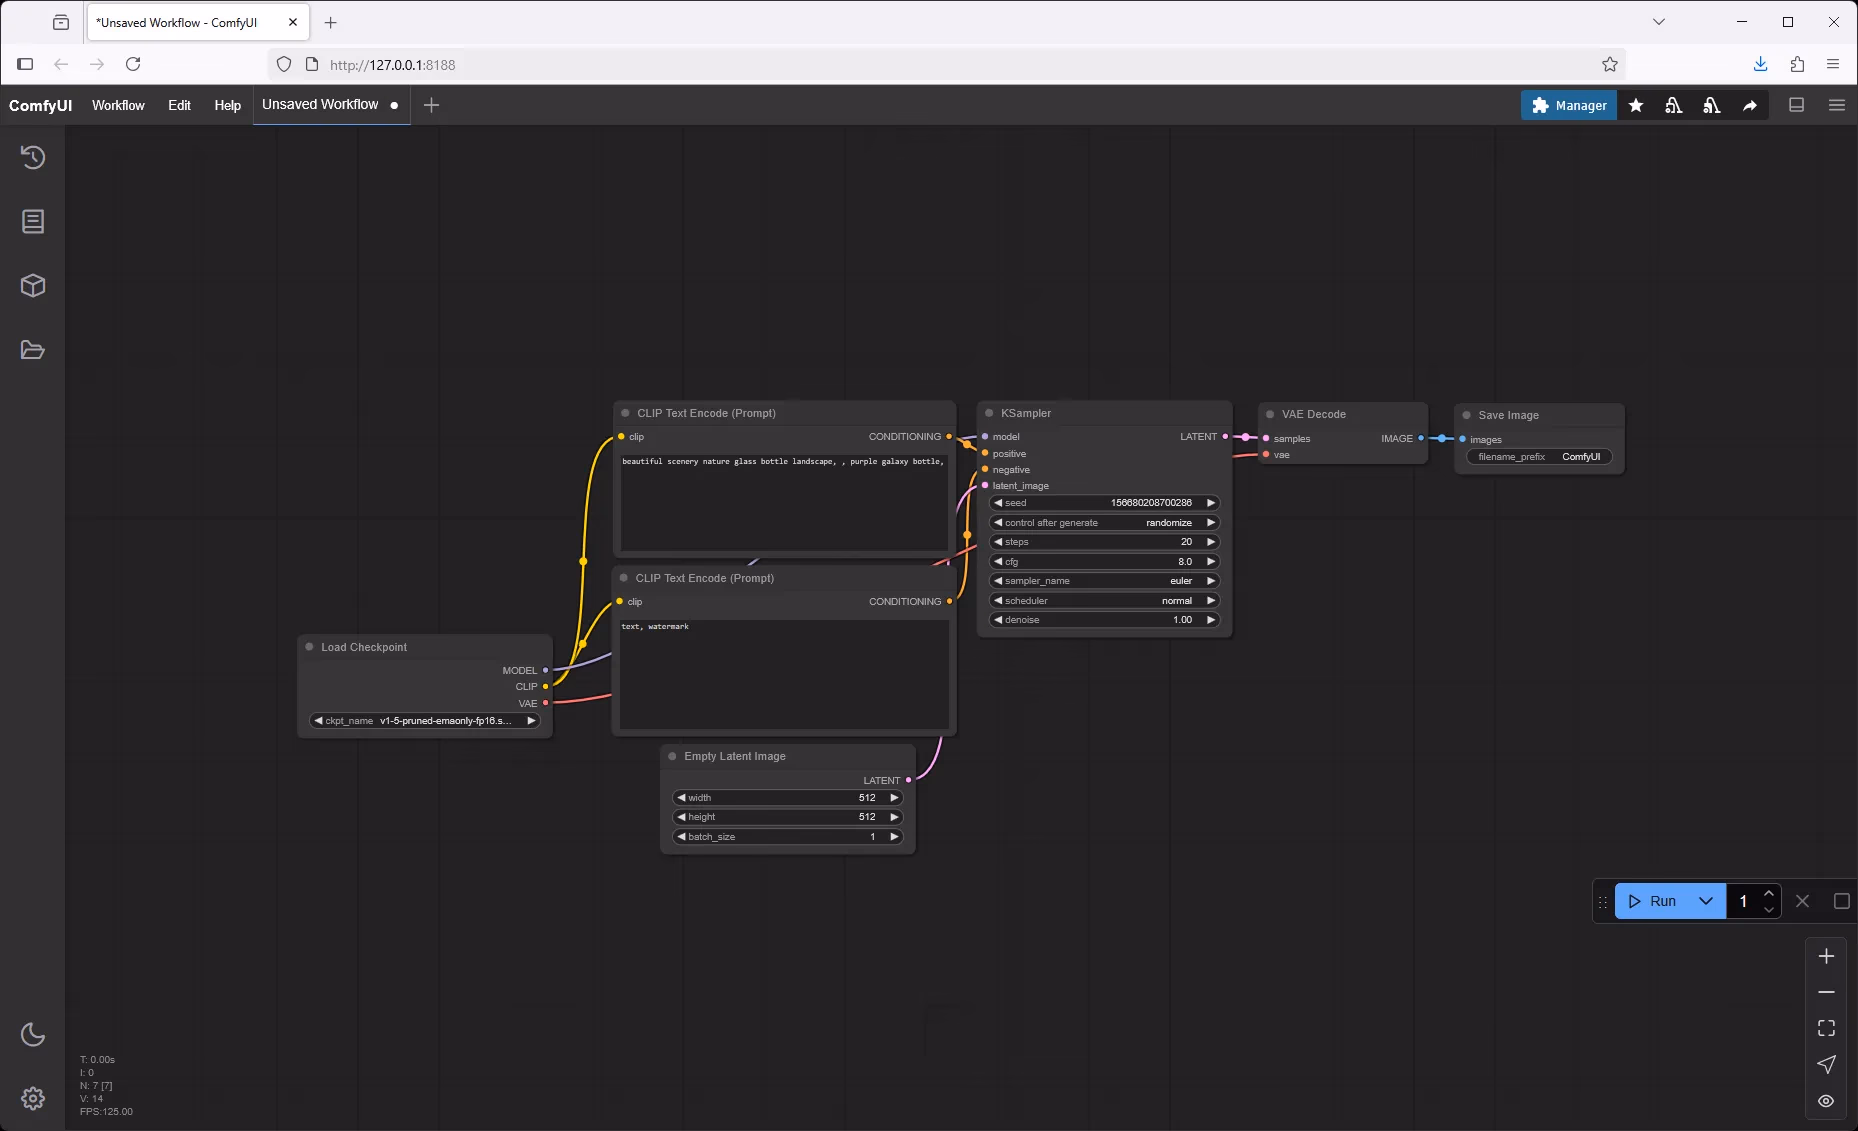
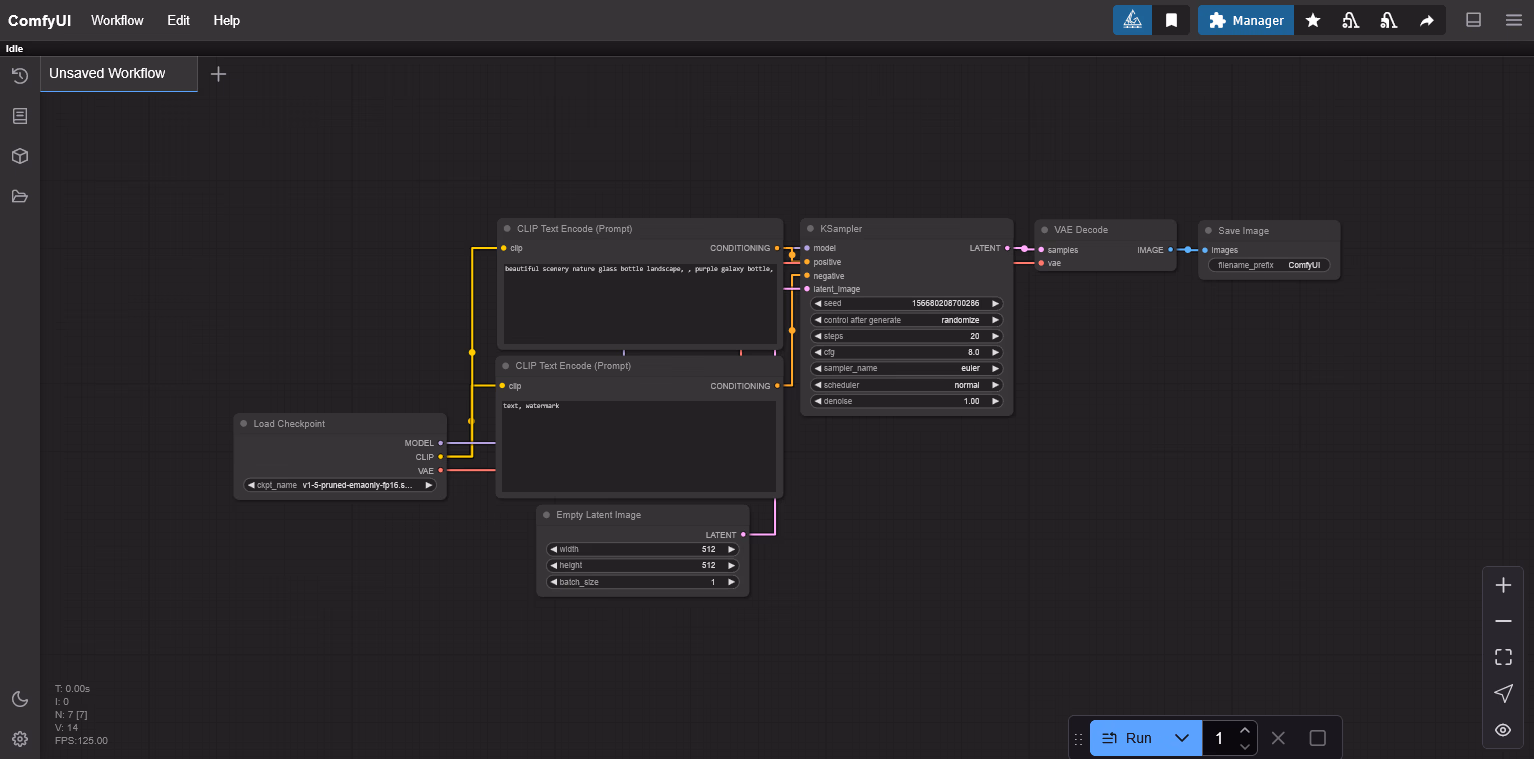
Welcome to ComfyUI!
Your ComfyUI installation is now running with the ComfyUI Manager fully integrated and ready for creative exploration.
Working with Workflows
Loading Your First Workflow
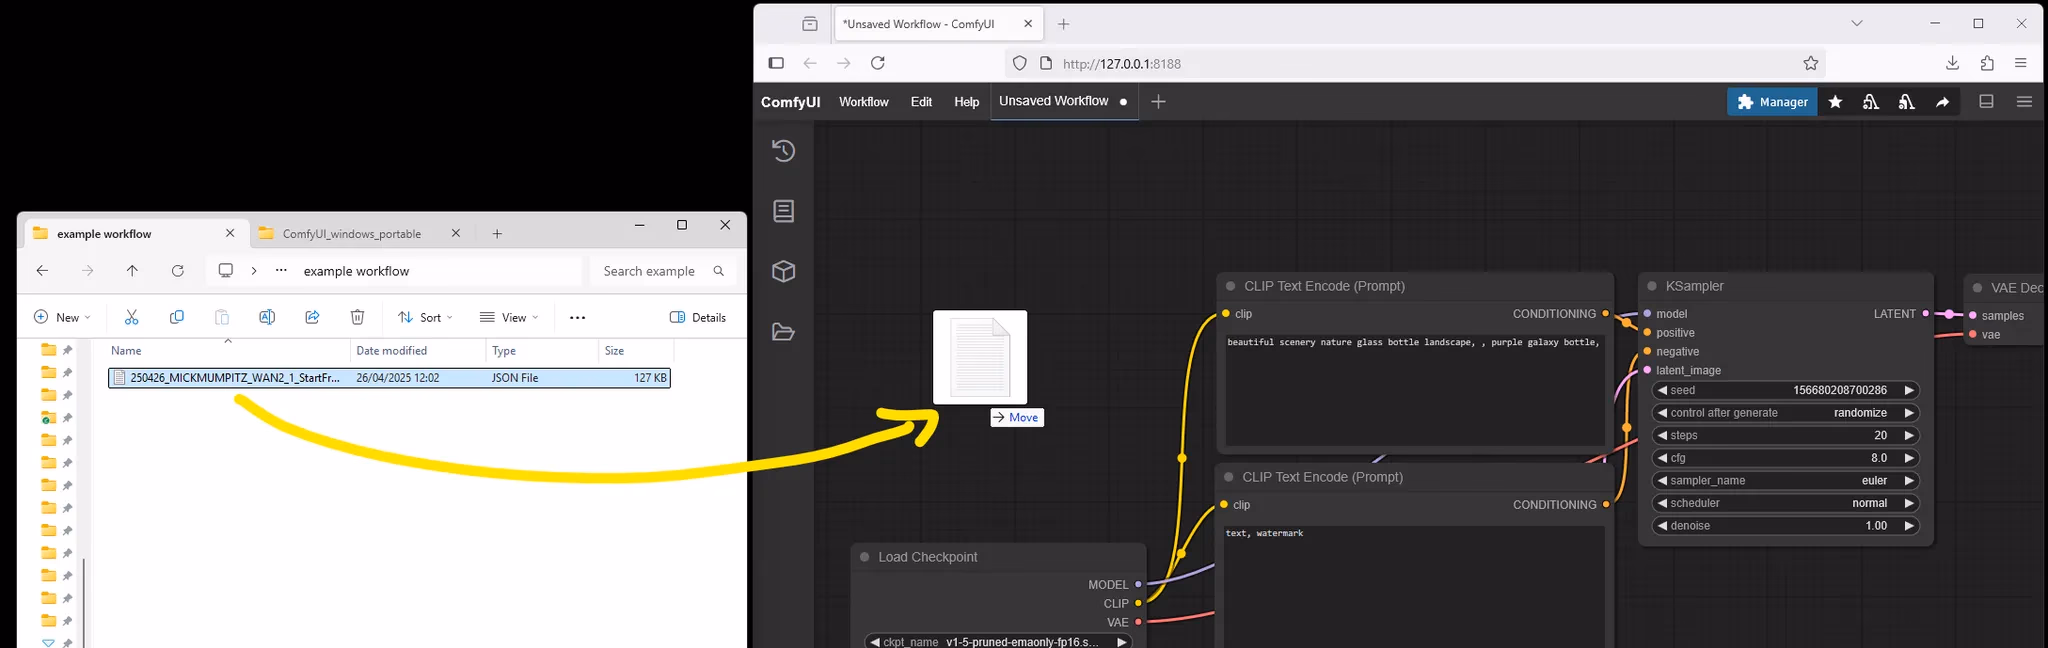
Learn to load and work with ComfyUI workflows:
- Drag and Drop Method: Simply drag any
.jsonworkflow file directly into the ComfyUI browser window - Automatic Loading: The workflow will automatically load and display all its nodes and connections
- Verify Components: Check that all nodes are properly connected and visible
Workflow File Types
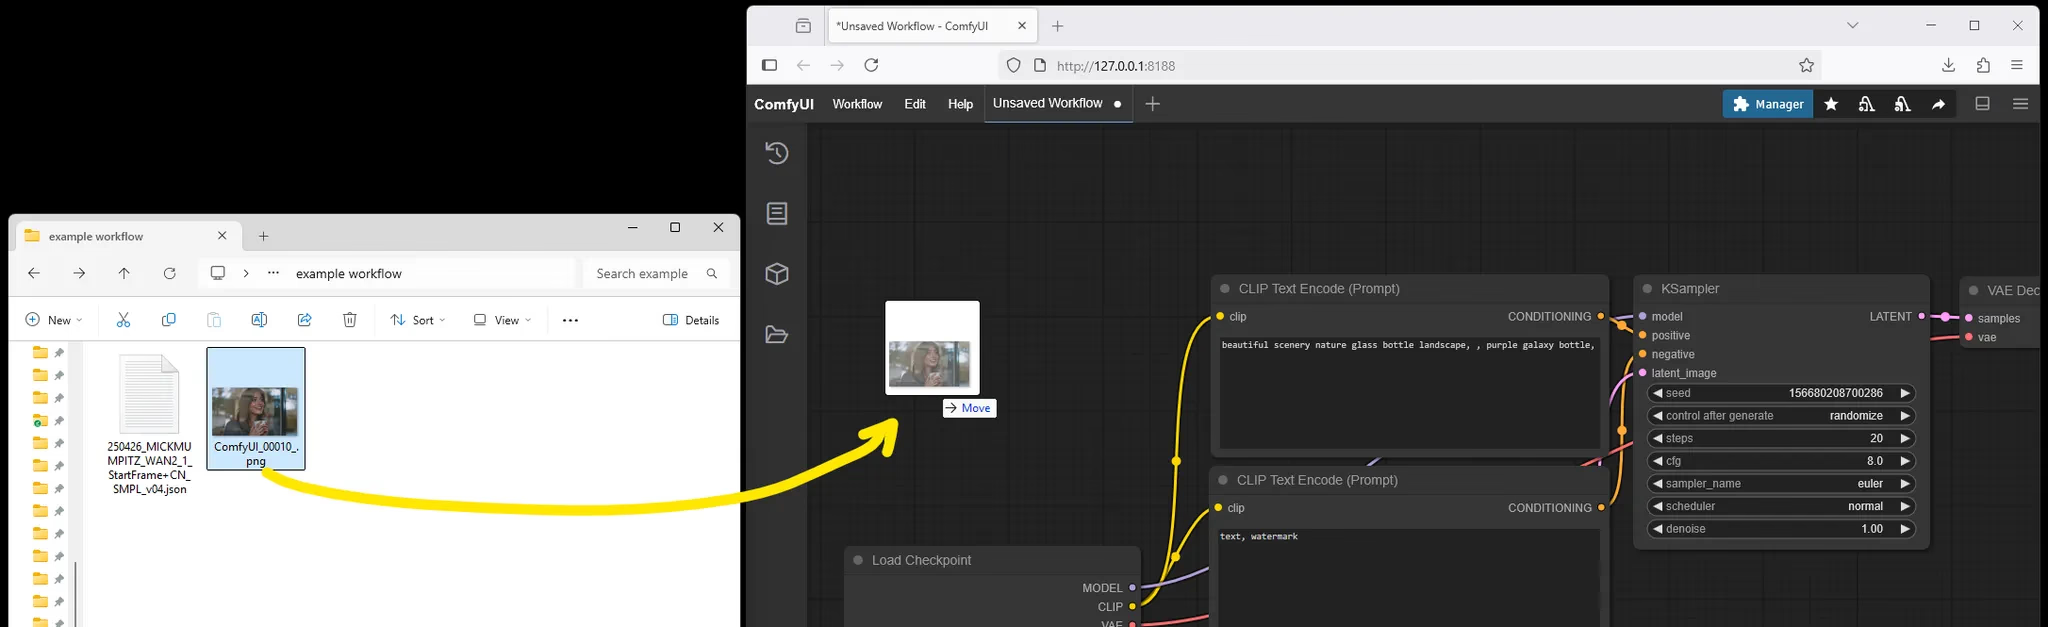
ComfyUI supports both .json workflow files and JPEG images with embedded workflow metadata.
Harness the power of embedded workflow data:
- JPEG with Metadata: Drag JPEG files that contain workflow information directly into ComfyUI
- Automatic Extraction: The system will automatically extract and load the embedded workflow
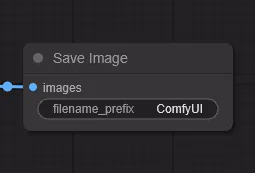
- Preserve Workflow History: Every image saved with the Save Image node includes its complete workflow data
Pro Tip
This feature is incredibly useful for sharing and reproducing specific image generation results.
Managing Custom Nodes
When workflows require additional components:
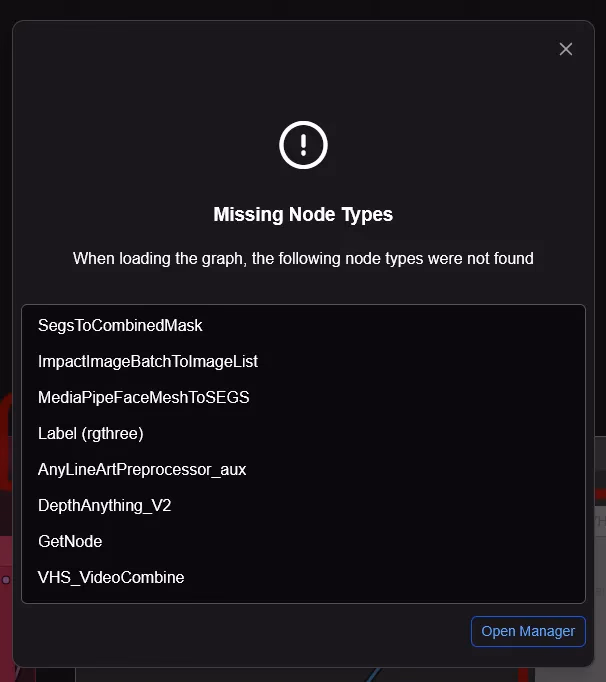
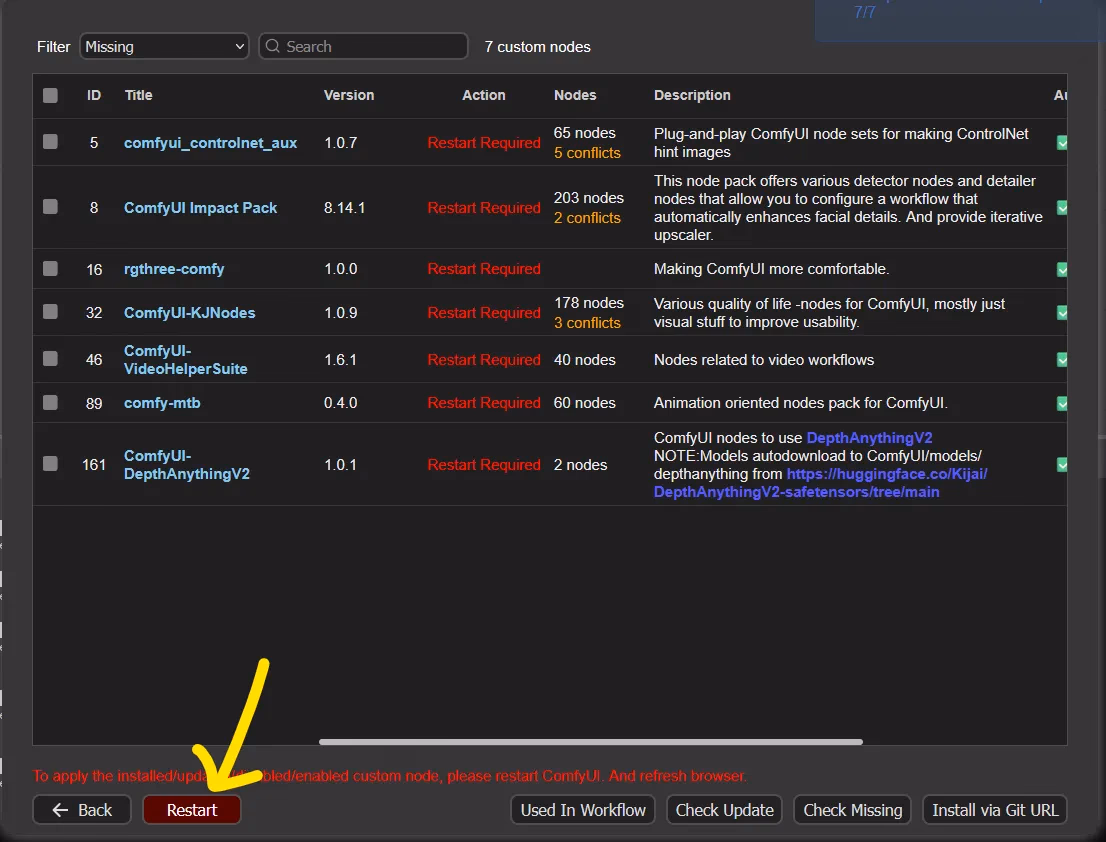
- Identify Missing Nodes: ComfyUI will display clear messages about any missing custom nodes
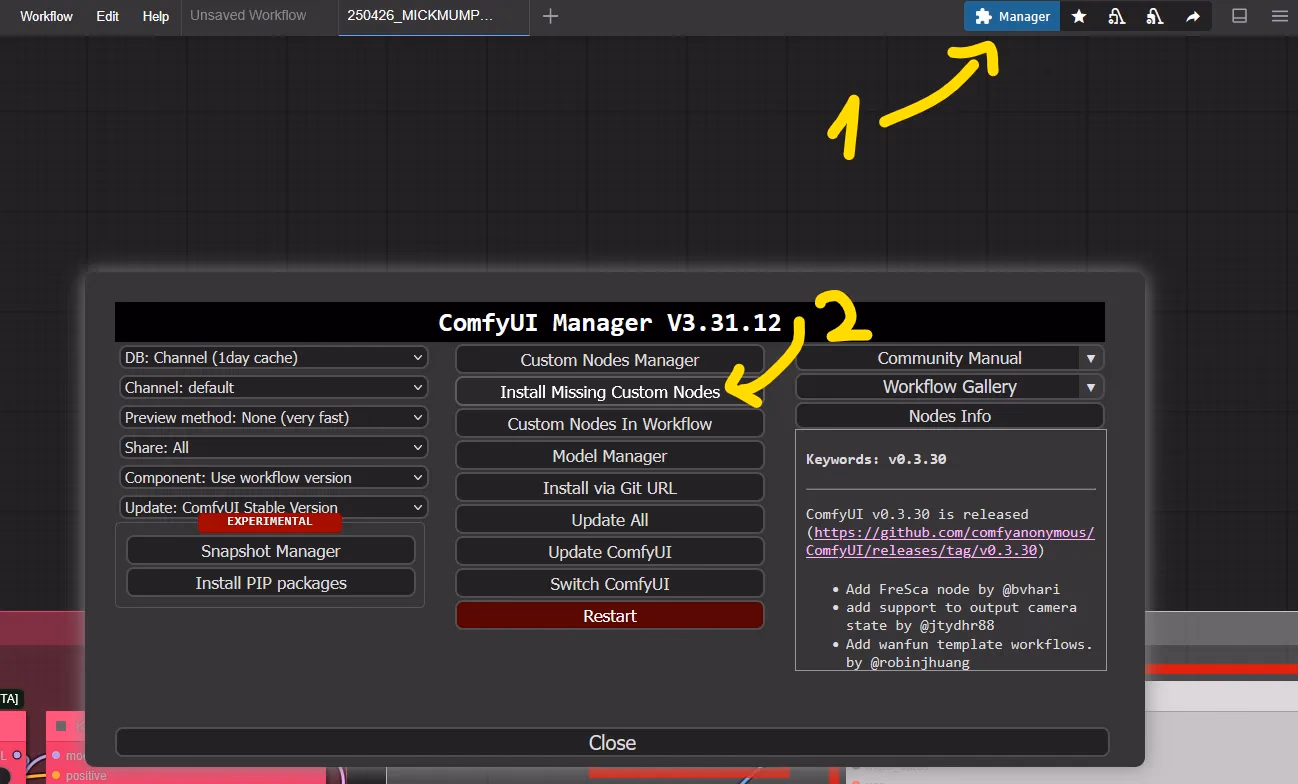
- Access the Manager: Click on the ComfyUI Manager button at the top of the interface
- Select Installation Option: Choose "Install Missing Custom Nodes" from the manager menu
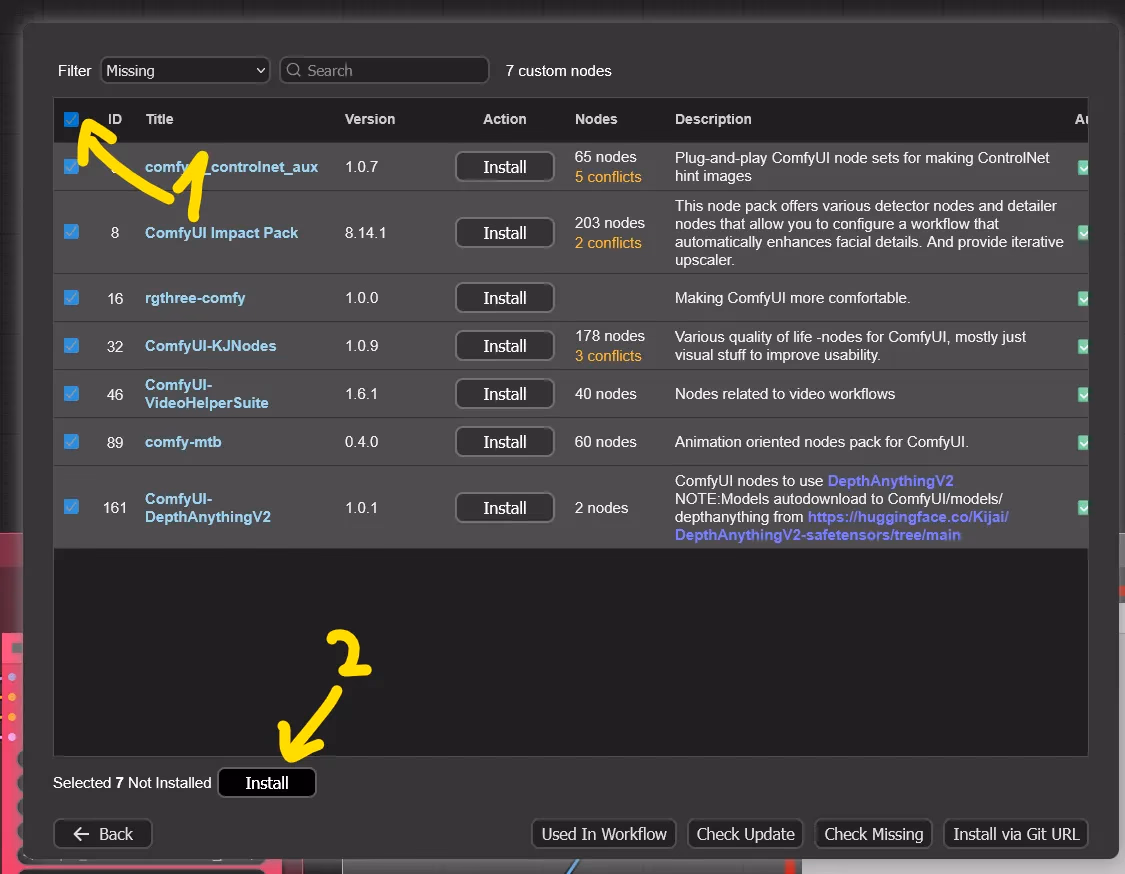
- Bulk Installation: Select all missing nodes and install them simultaneously
Restart Required
After installing new nodes, you must restart ComfyUI for the changes to take effect.
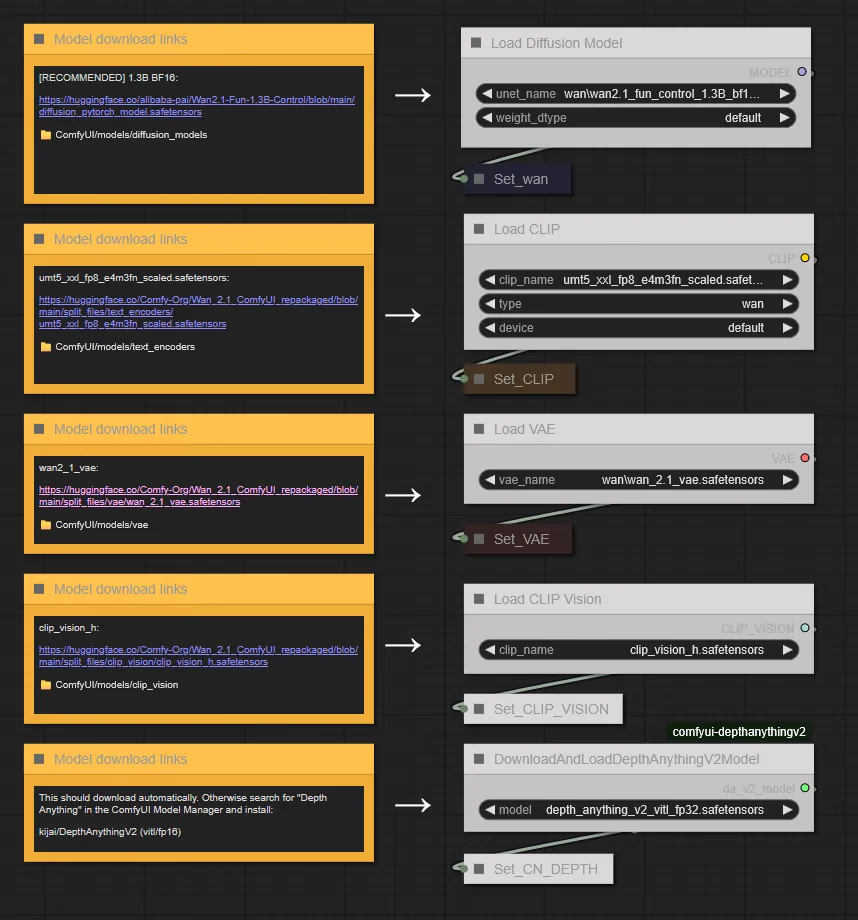
Model Management
Expand your creative capabilities with additional models:
- Identify Required Models: Check workflow documentation for any additional model requirements
- Download Models: Use provided links to download necessary model files
- Organize by Type: Place models in their designated folders (checkpoints, VAEs, LoRAs, etc.)
- Refresh the System: Press
Rin the ComfyUI interface to refresh the model list
Model Organization
Proper model organization is crucial for ComfyUI performance. Each model type has its specific folder structure.
Getting Started Tips
Best Practices for New Users
Maximize your ComfyUI experience from day one:
- Test with Free Workflows: Always start with free versions to ensure system compatibility
- Read Documentation: Thoroughly review workflow notes and requirements before beginning
- Backup Your Setup: Keep copies of your working configurations
- Join the Community: Connect with other users for support and inspiration
Troubleshooting Common Issues
If you encounter problems:
- Check System Requirements: Verify your hardware meets ComfyUI's specifications
- Review Error Messages: Read any error messages carefully for specific guidance
- Community Support: Visit the ComfyUI Discord #need-help channel
- Provide Detailed Information: When seeking help, include screenshots, error messages, and system specifications
Need Additional Help?
If you're still experiencing issues after following this guide, the ComfyUI community is incredibly supportive. Be sure to provide as much detail as possible when asking for help.
Next Steps
Congratulations! You now have a fully functional ComfyUI installation. Here's what you can explore next:
Recommended Learning Path
- Master Basic Workflows: Start with simple text-to-image generation
- Explore Custom Nodes: Discover the vast library of community-created extensions
- Experiment with Models: Try different checkpoint models and LoRAs
- Join Advanced Techniques: Learn inpainting, ControlNet, and style transfer
Community Resources
- Official Documentation: ComfyUI GitHub Repository
- Community Discord: ComfyUI Discord Server
- Workflow Library: Explore thousands of shared workflows
- Model Resources: Access the latest models and checkpoints
Download Setup Checklist
Conclusion
You've successfully completed the ComfyUI installation process! This powerful platform is now ready to transform your creative ideas into stunning AI-generated content. Remember:
- Start with simple workflows and gradually increase complexity
- Keep your installation updated with the latest custom nodes
- Join the community to share your creations and learn from others
- Experiment freely - ComfyUI's node-based system encourages creative exploration
Ready to Create!
Your ComfyUI installation is complete and ready for unlimited creative possibilities. Happy generating!